| |
|
| |
|
|
|
|
| |
 |
| |
|
| |
 |
| |
|
| |
Plugins to use:
Toadis - Filter
Unlimited |
| |
|
|
|
 |
|
|
|
|
|
|
|
|
 |
|
|
The ruler, can you take
down and use as a
pointer |
|
|
|
|
|
|
|
|
 |
|
|
|
|
|
1.Open
a new raster layer 700 x 550 |
|
|
|
|
|
2.
Make a gradient
as shown below, set #
d0bfa1 in
the foreground color and
# b2a278 in
background color |
|
|
 |
|
|
|
|
|
Use it on your layer! |
|
|
|
|
|
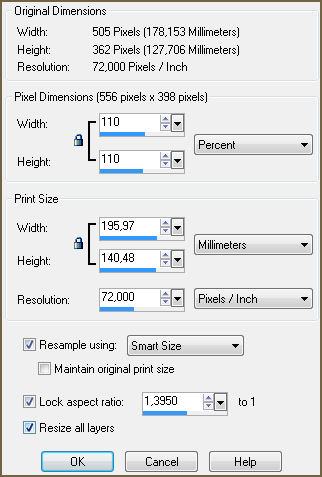
3.Open the image
Misted_Weeping_Willows_RM, Resize
the image so that it
becomes larger as
shown below .....
repeat 4 x! |
|
|
Go to
edit / copy,
activate your working
layer and go
back to
edit and select
paste as new layer. |
|
|
 |
|
|
|
|
|
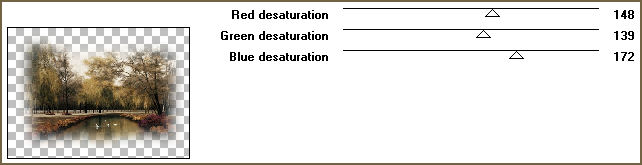
Go in
Effect /
plugins /
toadies / old
colorur with settings as
shown below. |
|
|
 |
|
|
|
|
|
Set the opacity to
about. 50
- Merge /
Merge Visible |
|
|
|
|
|
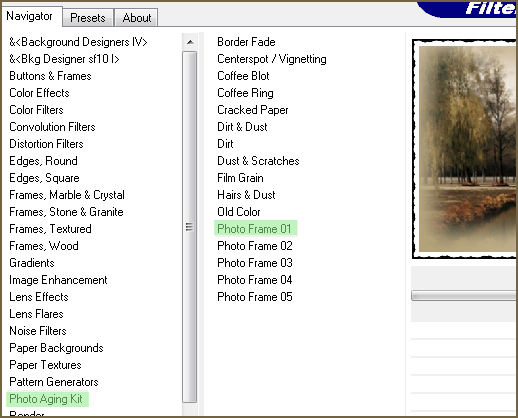
4.Open
small_Misted_Weeping_Willows!
Go to
photo aging
kit / frame
01. My filter,
have I imported into the
Filter Unlimited, |
|
|
it
is not located in
there by default! |
|
|
 |
|
|
|
|
|
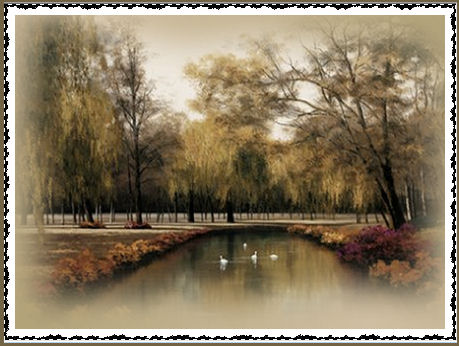
Click with
your magic wan on
the black edge, and
then click Delete
on the keyboard, set
options as shown
below! |
|
|
 |
|
|
 |
|
|
Selection / select none! |
|
|
|
|
|
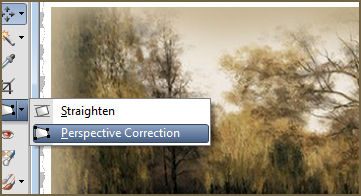
5.We
need to put the image
on the skew, click on
perspective correction
as shown below! |
|
|
 |
|
|
|
|
|
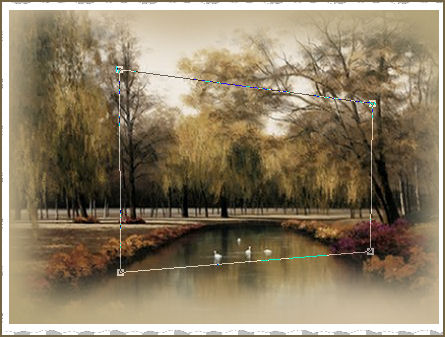
Set the settings as
shown below! |
|
|
 |
|
|
|
|
|
Drag
the mouse so
you get something like
below, quite
similar to it probably
will not be, but
it does not! |
|
|
 |
|
|
|
|
|
Double-click
your mouse on the image
or click as shown
below! |
|
|
 |
|
|
|
|
|
Go
to edit /
copy, activate your
working layer
and go back
into edit /
paste! |
|
|
|
|
|
settings as
shown below
If you
think the picture
is a little too long or
big, so right
it with
the pick tool |
|
|
 |
|
|
|
|
|
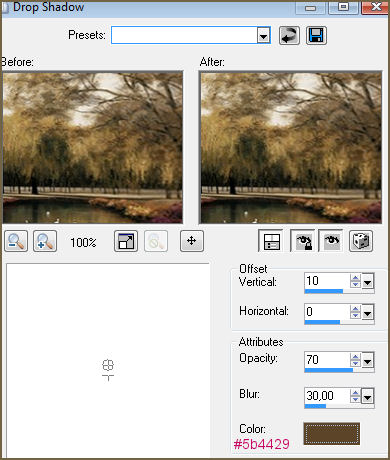
Add drop
shadow with settings as
shown below |
|
|
 |
|
|
Shadov cokor #5b4429 |
|
|
|
|
|
Set the
opacity to about
95 and merge
/ merge visible |
|
|
|
|
|
|
|
|
6.Image
add / borders
30 pixels
white. click with the
magic wan
on the white edge! |
|
|
|
|
|
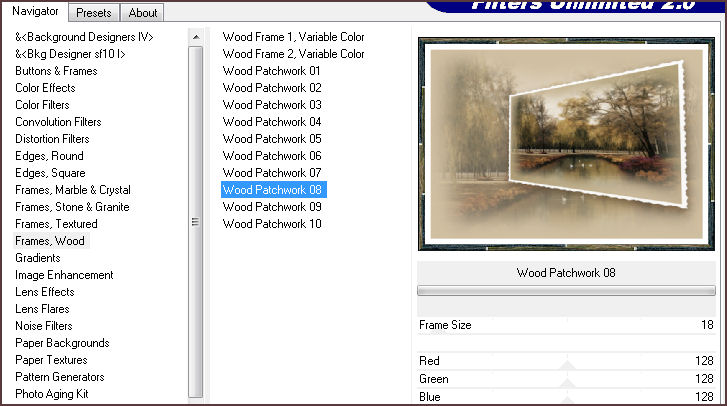
Go to
Effect / plugins
/ filter unlimited
/ Frames,
wood, with settings as
shown below. |
|
|
 |
|
|
|
|
|
Selection / select none! |
|
|
|
|
|
Click
on the rest of the white
edge with magic
wan and go
back into
Filters Unlimited, choose
paper textures /
canvas fine
with the default settings! |
|
|
|
|
|
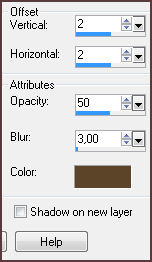
selection still
on! go to
drop shadow with settings
as shown below!
Repeat with -2
in V and H. |
|
|
 |
|
|
|
|
|
|
|
|
7.
Open
tube calguiscygnes24410
resize 7 x
85% and set it
as my image |
|
|
|
|
|
|
|
|
8.Open
the tube 14 to 2-06swans_sw2,
set it as my image,
dublicate it
so it becomes a little
clearer! |
|
|
|
|
|
Merge / merge visible |
|
|
|
|
|
|
|
|
9.
Open
tube misted_svaneunger
and set it as
my image. Merge
/ Merge Visible. |
|
|
|
|
|
|
|
|
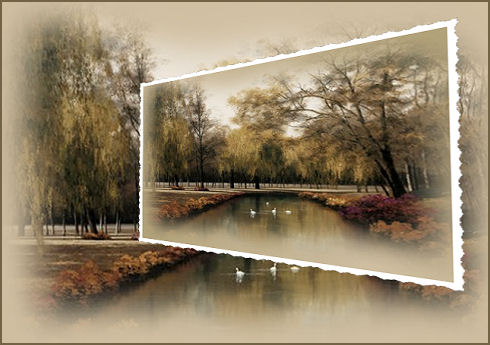
10.
Write this:
Nature's Beauty in
the picture, with
a font and with
the colors. you
like! |
|
|
|
|
|
|
|
|
|
|
|
Add your name |
|
|
|
|
|
Open Animation Shop |
|
|
|
|
|
open
animation KB
Moewenflug ....
there are 36
frames the animation
in this, so you should
have as many Framer
in your psp-image! |
|
|
|
|
|
You must right-click
one of frames and select
Dublicate selected. |
|
|
|
|
|
When you
have 36 Frames
go into
edit / select
all, do the same on the
animation. |
|
|
|
|
|
Then, just
drag the animation
onto the 36
frames of the
psp! You'll
start with the frame
4, pull frame
4 to frame
4 |
|
|
|
|
|
The End ! |
|
|
|
|
|
|
|
|
created 27
Febuar 2012 |
|
|
©
vitasClipart.dk |